How to onboard an existing Helm application in ArgoCD
GitOps is the recommended way of implementing continuous deployment for cloud-native applications. It helps an organization by minimizing manual mistakes while deploying an application, as Git will be the single source of truth. Hence, changes can be easily tracked across teams.
This article aims to help engineers who’d like to adopt GitOps culture in their company via ArgoCD on the applications that are already deployed and running in the Kubernetes clusters.
Since GitOps is relatively new, one might have questions regarding how to onboard existing apps to ArgoCD without redeploying their microservices. Let’s see how to solve that.

Prerequisites
- Kubernetes cluster
- Helm v3
Application via Helm repository
In ArgoCD, you can install Helm-based apps in two ways. One of them is installing apps directly via a remote Helm repository. This can be Gitlab’s Helm repository, self-hosted options like Chartmusem, or GitHub Pages.
Let’s install app nginx-ingress using helm repository. This step tries to simulate an app already running in your cluster deployed via helm install command before you onboard it via ArgoCD.
#add the helm repo
helm repo add ingress-nginx https://kubernetes.github.io/ingress-nginx

#install the helm chart
helm install ingress-nginx ingress-nginx/ingress-nginx --version 4.4.0 --set controller.service.type=ClusterIP

#kubectl get pod
NAME                                        READY   STATUS    RESTARTS   AGE
ingress-nginx-controller-6f7bd4bcfb-dp57x   1/1     Running   0          3m50s
Once the pods are running, let’s install ArgoCD to our cluster.
#add the helm repo
helm repo add argo https://argoproj.github.io/argo-helm

#install the helm chart
helm install argocd argo/argo-cd --set-string configs.params."server\.disable\.auth"=true --version 5.12.0 --create-namespace -n argocd
Validate that ArgoCD pods are running and are in READY state.
kubectl get pod -n argocd

NAME                                                READY   STATUS    RESTARTS   AGE
argocd-application-controller-0                     1/1     Running   0          14m
argocd-applicationset-controller-6cb8549cd9-ms2tr   1/1     Running   0          14m
argocd-dex-server-77b996879b-j2zd8                  1/1     Running   0          14m
argocd-notifications-controller-6456d4b685-kb6hn    1/1     Running   0          14m
argocd-redis-cdf4df6bc-xg7v6                        1/1     Running   0          14m
argocd-repo-server-8b9dd576b-xfv8s                  1/1     Running   0          14m
argocd-server-b9f6c4ccd-7vdjz                       1/1     Running   0          14m
Now that ArgoCD is running, let’s create the ArgoCD Application manifest for our app.
cat <<EOF >> nginx-ingress.yaml
apiVersion: argoproj.io/v1alpha1
kind: Application
metadata:
  name: ingress-nginx
  namespace: argocd
spec:
  project: default
  destination:
    namespace: default  #update namespace name if you wish
    name: in-cluster   #update cluster name if its different
  source:
    repoURL: https://kubernetes.github.io/ingress-nginx
    targetRevision: "4.4.0"
    chart: ingress-nginx
    helm:
      values: |
        controller:
          service:
            type: ClusterIP
EOF
Few points to note in the above manifest :
- If you’re completely new to ArgoCD and aren’t aware of the structure of an application manifest, I suggest you read about ArgoCD Application here.
- Any helm custom values you wish to override on the default helm values need to be added in the helm values section.
- In the future, whenever you need to upgrade the app/chart version, you can just update the
targetRevisionwhich is the git tag of the helm chart release and ArgoCD will pull that chart and apply the changes. This can be done either by editing this file or by updating the tag via ArgoCD UI. [**metadata.name**](<http://metadata.name>)should exactly match the helm release name. Else this will be considered a new release.
The main idea here is that the helm value config specified via ArgoCD should exactly match the config (values file) specified at the time of helm install or upgrade.
For example, during helm install, if the service type was ClusterIP, ArgoCD app manifest should also have that config. If you don’t specify that, ArgoCD will override with default chart values which will cause downtime.
This mainly needs to be taken care of for dependent third-party charts for example MongoDB, Redis etc.
Ok. Let’s apply the manifest we created using the command.
kubectl apply -f nginx-ingress.yaml

#application.argoproj.io/my-ingress-nginx created
To access Argo UI, lets port-forward the argocd-server service and open in your browser : https://localhost:8080
kubectl port-forward service/argocd-server 8080:8080 -n argocdNow, if you go to the nginx-ingress app, its status is OutOfSync.
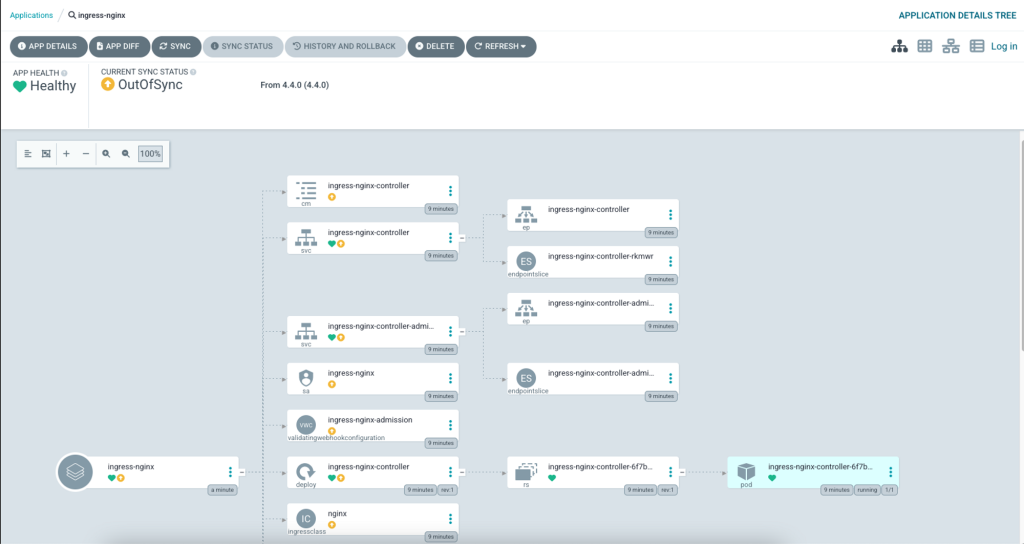
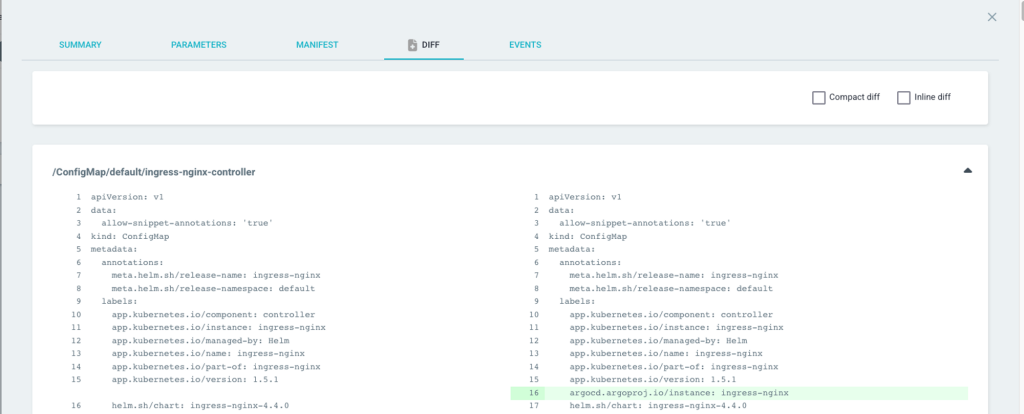
Let’s sync the app which will apply that ArgoCD annotation on all resources.
After the sync, as you can see no resources got removed or recreated.
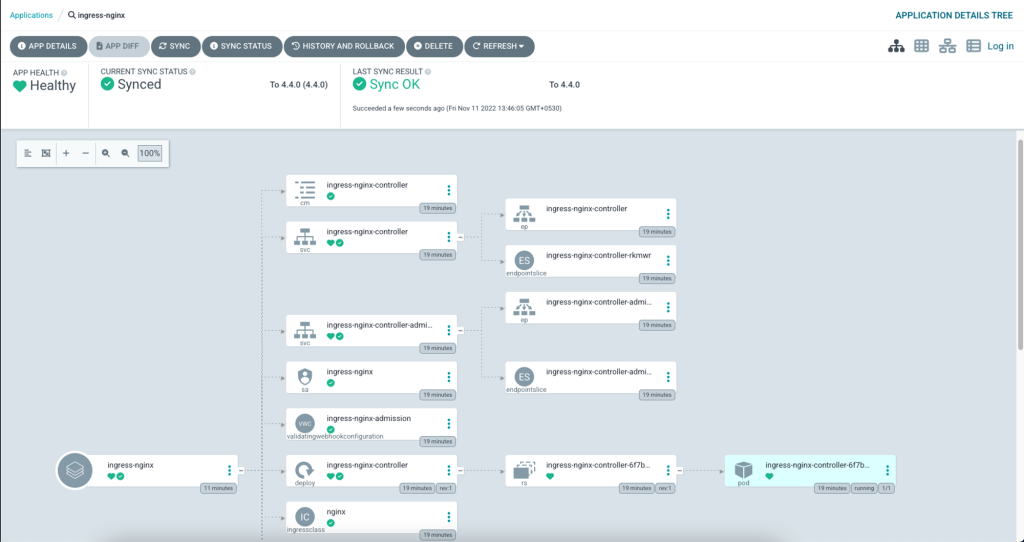
kubectl get all -l app.kubernetes.io/name=ingress-nginx

NAME                                            READY   STATUS    RESTARTS   AGE
pod/ingress-nginx-controller-6f7bd4bcfb-dp57x   1/1     Running   0          21m

NAME                                         TYPE        CLUSTER-IP     EXTERNAL-IP   PORT(S)          AGE
service/ingress-nginx-controller             ClusterIP   10.96.156.40   <none>        80/TCP,443/TCP   21m
service/ingress-nginx-controller-admission   ClusterIP   10.96.118.65   <none>        443/TCP          21m

NAME                                       READY   UP-TO-DATE   AVAILABLE   AGE
deployment.apps/ingress-nginx-controller   1/1     1            1           21m

NAME                                                  DESIRED   CURRENT   READY   AGE
replicaset.apps/ingress-nginx-controller-6f7bd4bcfb   1         1         1       21m
Applications via Git Repository
If your helm chart is not hosted in a helm repository and stored in GitHub or any other SCM tools like GitLab or BitBucket, migration of that helm app can also be done easily.
Fork the sample app repository : https://github.com/stefanprodan/podinfo
Clone the repository and update replicacount in values.yaml from 1 to 3.
#clone your fork
git clone https://github.com/<user-name>/podinfo.git && cd podinfo/charts/podinfo

#update  replcaCount to 3
sed -i -e '/replicaCount/ s/: .*/: 3/' values.yaml
Push this change to your GitHub repository.
Deploy the helm chart via helm.
helm install podinfo-git . -f values.yaml -n defaultCreate an ArgoCD Application manifest that will point to your repository and the path inside the repository where the helm chart is stored.
cat <<EOF >> podinfo-app-git.yaml
apiVersion: argoproj.io/v1alpha1
kind: Application
metadata:
  name: podinfo-git
  namespace: argocd
spec:
  project: default
  destination:
    namespace: default  #update namespace name if you wish
    name: in-cluster   #update cluster name if its different
  source:
    repoURL: 'https://github.com/tanmay-bhat/podinfo'  #replace with your username
    path: charts/podinfo
    targetRevision: HEAD
    helm:
      valueFiles:
        - values.yaml       #any custom value file you want to apply.
EOF
ArgoCD automatically detects that in the path you specified, the application has to be onboarded as a Helm chart not via Kubernetes Manifest files. It understands that type by scanning Chart.yaml in the path you specified to detect the Kind of Application. In my case chart.yaml is inside charts/podinfo of the repository. You can read more about automated tool detection here.
Apply the manifest you created into argocd namespace.
kubectl apply -f podinfo-app-git.yaml -n argocd

#application.argoproj.io/podinfo configured
Just like the previous migration, this app also will be out of sync with annotation change update. Sync the application after reviewing the App Diff.
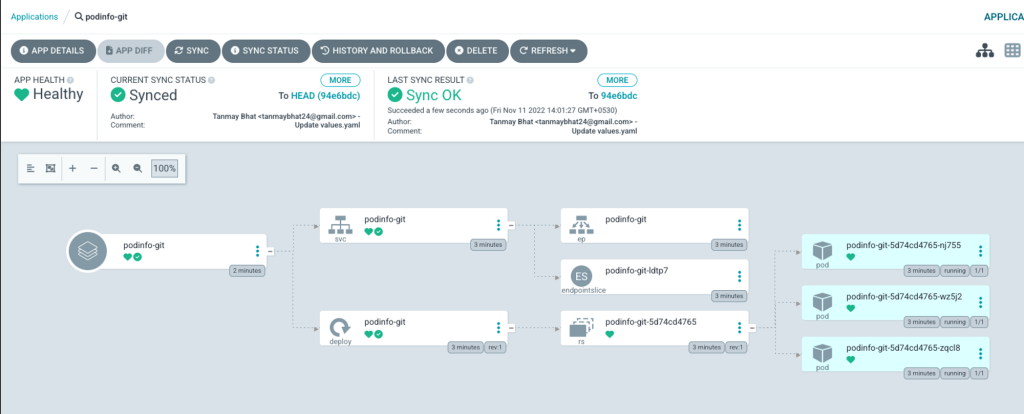
As you can see from the above snapshot, the pods & other resources are not recreated.
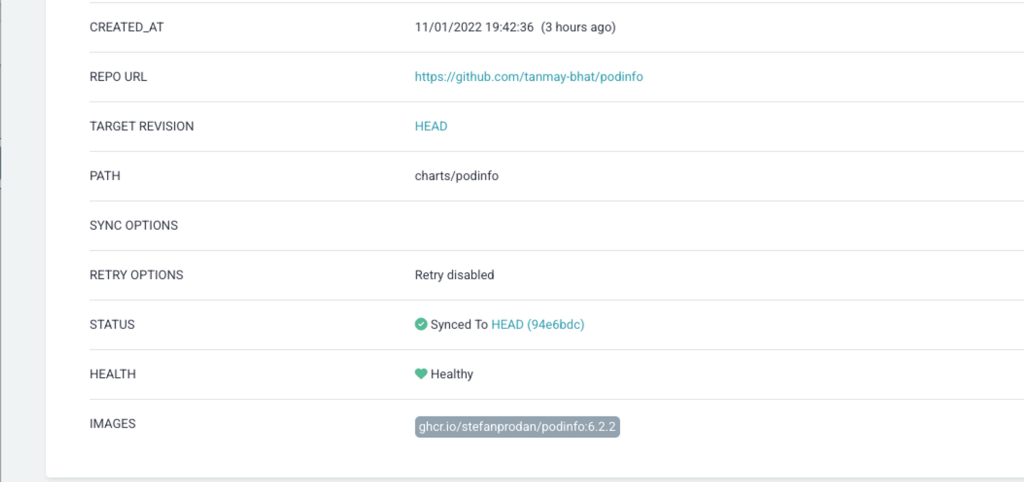
If you take a look at the App Details of this over the UI, we can see that it synced the configs to our GitHub repository.
Gotchas
- I haven’t added the auto sync option in ArgoCD application definition, since it’s always best to see what’s the app diff, review and then sync.
- Certain application like Grafana has
checksum/secretin their template definitions.- While migrating to ArgoCD, its own annotation needs to be applied as seen above.
- Once that annotation is applied to the secret, its checksum changes and that checksum will get updated in the deployment.
- So for application config like those, the pod will get recreated.
References
https://argo-cd.readthedocs.io/en/stable/faq/#why-is-my-app-out-of-sync-even-after-syncing
https://argo-cd.readthedocs.io/en/stable/getting_started/
Aviator: Automate your cumbersome merge processes
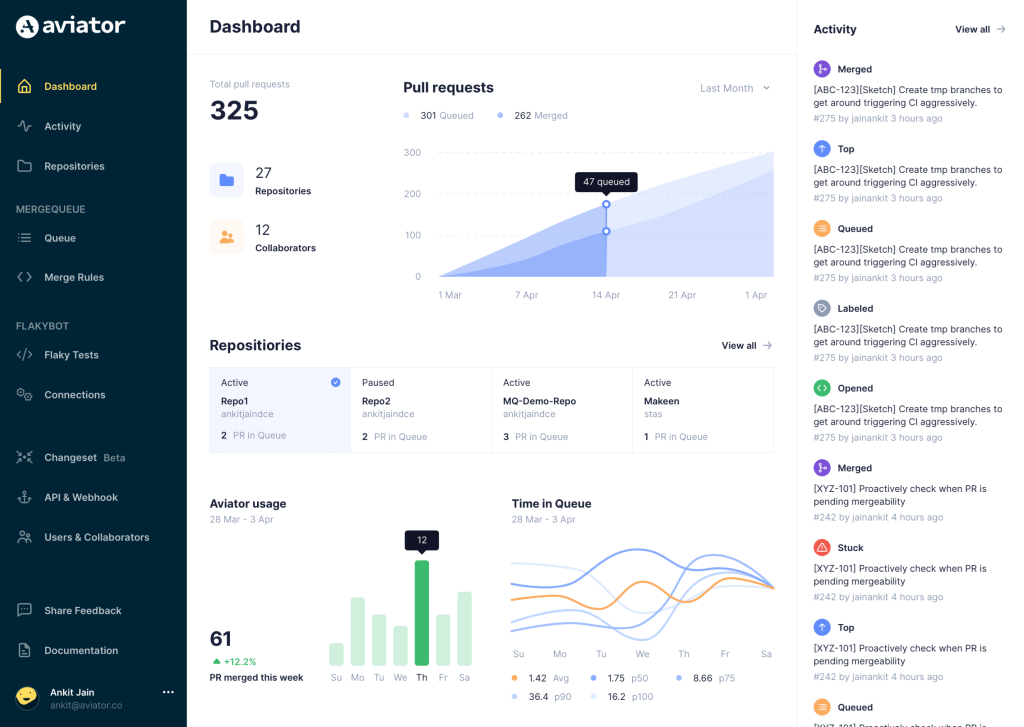
Aviator automates tedious developer workflows by managing git Pull Requests (PRs) and continuous integration test (CI) runs to help your team avoid broken builds, streamline cumbersome merge processes, manage cross-PR dependencies, and handle flaky tests while maintaining their security compliance.
There are 4 key components to Aviator:
- MergeQueue – an automated queue that manages the merging workflow for your GitHub repository to help protect important branches from broken builds. The Aviator bot uses GitHub Labels to identify Pull Requests (PRs) that are ready to be merged, validates CI checks, processes semantic conflicts, and merges the PRs automatically.
- ChangeSets – workflows to synchronize validating and merging multiple PRs within the same repository or multiple repositories. Useful when your team often sees groups of related PRs that need to be merged together, or otherwise treated as a single broader unit of change.
- FlakyBot – a tool to automatically detect, take action on, and process results from flaky tests in your CI infrastructure.
- Stacked PRs CLI – a command line tool that helps developers manage cross-PR dependencies. This tool also automates syncing and merging of stacked PRs. Useful when your team wants to promote a culture of smaller, incremental PRs instead of large changes, or when your workflows involve keeping multiple, dependent PRs in sync.

